With their vast database of contacts that help us stay in touch with friends, family, coworkers, and acquaintances, smartphones have become indispensable in today’s hectic world. The last thing you want to happen when switching to a new Android phone is to lose all of your important contacts. Fortunately, it’s not as hard as you might think to Transfer Contacts from Android to Android. We’ll walk you through easy ways to guarantee a smooth transfer without losing a single contact in this guide.
Transfer Contacts from Android to Android: Contact Transfer
- On your computer, install Contact Transfer, then use it.
- Select “Android” as the transfer’s Source and Destination. Next, select “Continue.”
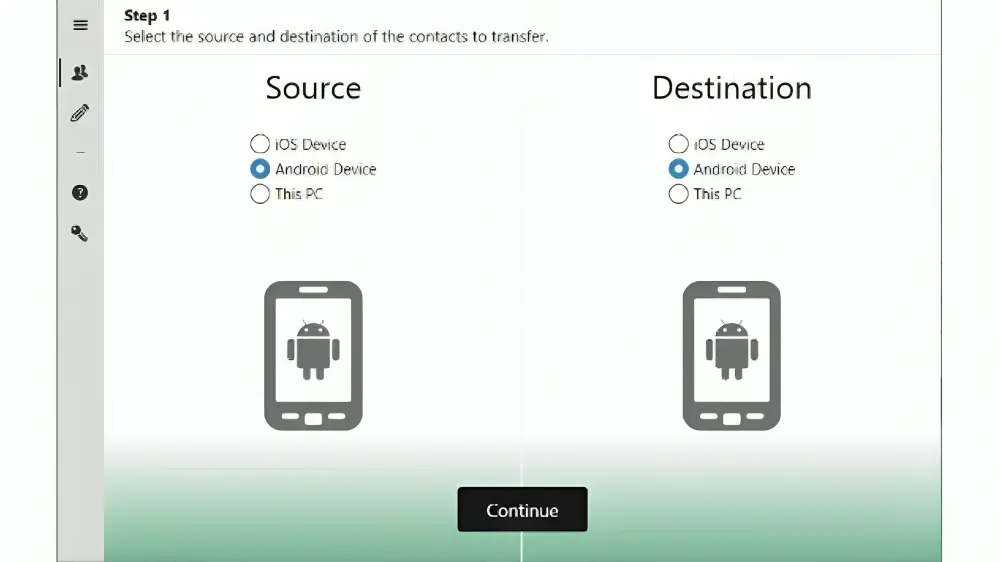
- Install the Contact Transfer application on every Android device you own by Installing it from the Google Play Store.
- Make sure your Android device and PC are linked to the same wireless network.
- To copy all of your contacts, open the Contact Transfer app on your Android device. Select “Scan Contact Transfer QR Code”. This will start your device’s camera. Point your camera at the QR code that appears under “Source” on your computer.

- Once your source device is connected, you can use the Android device you wish to transfer contacts to repeat the same procedure by scanning the “Destination” QR code.

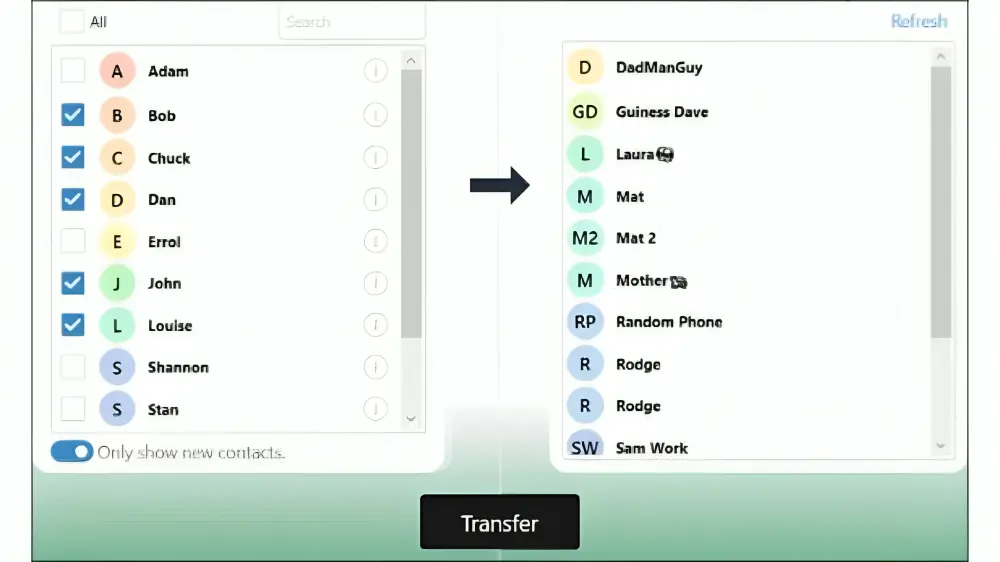
- You can browse your contacts and choose which ones to transfer once your devices are connected. Just click the “All” checkbox to choose every contact from your source device.
- Click “Transfer” to copy the contacts you’ve chosen from the source to the destination!
How to Transfer Contacts from Android to Android via SIM card?
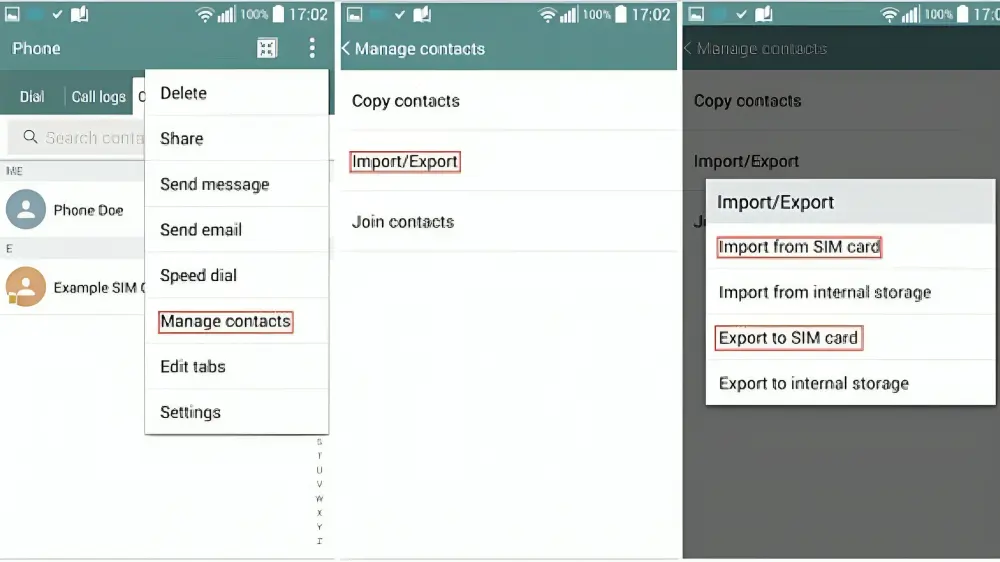
- On the Android device that is the source, launch the “Contacts” app, and then tap “Menu” (the three vertical dots at the top).
- Select “Import/Export Contacts” after selecting “Manage Contacts” from the menu that displays.
- Select “Export Contacts” and then a SIM card.
- Remove the SIM card and place it into the destination device after all of the contacts on the device have been transferred to it.
- Go to “Menu > Manage Contacts > Import/Export Contacts” after opening the Contacts app on the destination device, and then choose “Import from SIM Card.”
- As soon as every contact has been transferred, keep the devices linked to the computer.
- In a few minutes, the transferred contacts will be visible on the destination device.
How to Transfer Contacts from Android to Android with Google Account and Sync?
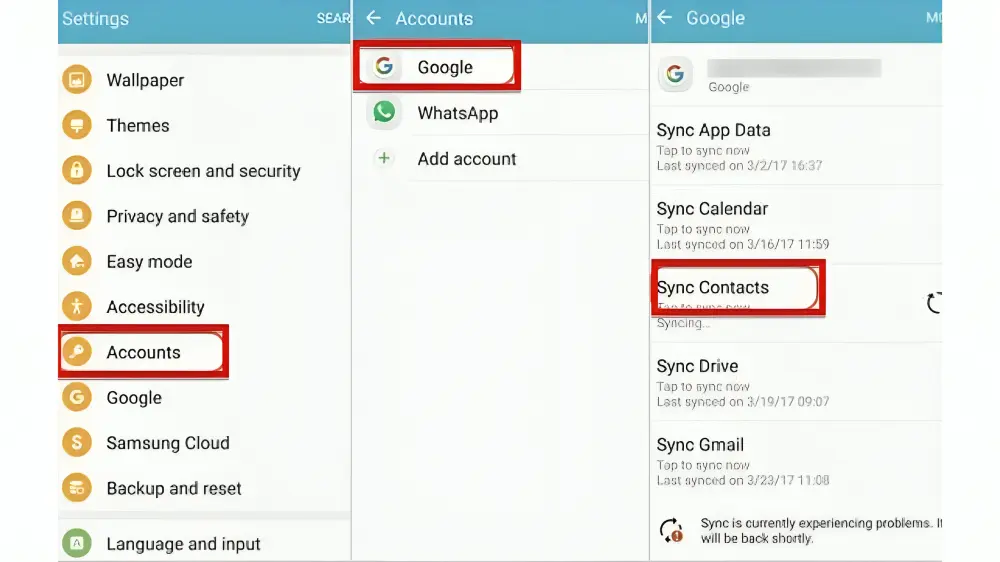
- The first thing you should do is set up a Google account on the source device if you haven’t already. Go to Settings > Accounts > Add account and choose Google to accomplish that. To add the account, log into your Google account.
- Sync the contacts with this Google account at this time. Go to Settings > Accounts > Google and select “Sync Contacts” to accomplish that.
- Add the same Google account to the destination device, then navigate to Settings > Account >Google and choose “Contacts” from the list of Google Backups. The contacts will be moved to the destination device when you tap “Sync Now.”
Backup and Restore Android Contacts: Droid Transfer
- Open Droid Transfer after installing it on your computer.
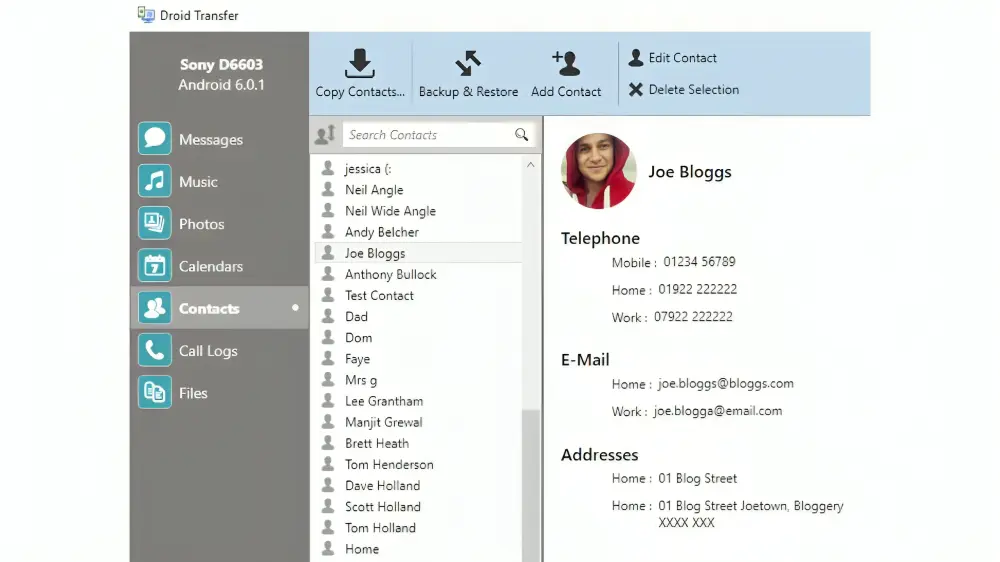
- Install the Transfer Companion App for free on each of your two Android devices.
- To connect Android and PC, use the Transfer Companion App to scan the Droid Transfer QR code with the phone that has your contacts on it.
- To view the Android contacts, click “Contacts”.
- Next, select “Backup & Restore” and finally “Backup”.
- Click “Backup” after deciding whether to back up every contact or just a subset of them.

- Connect the new Android device to which you wish to transfer the contacts after disconnecting your old one from the backup.
- Press “Backup & Restore” once more, followed by “Restore”.
- Find and open the contact backup file that you saved in step six.
- You can click “Restore” after selecting contacts or choosing to restore all of them.

Manually Export your Contacts and Import on a new Android
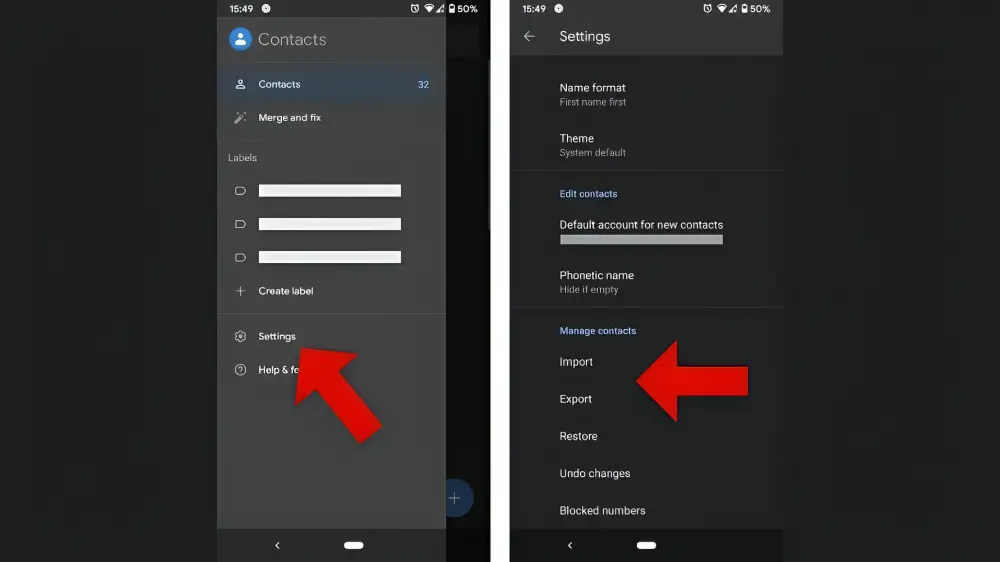
- Open the Android app called Contacts, which contains your contact list.
- Pull up the menu (usually represented by three dots or three lines).
- Select Export Contacts. It might take tapping Settings to reveal the export option.
- All of your contacts will be saved on your phone as a VCF file by the Contacts app.
- The VCF file needs to be copied or moved to your new Android device. You can accomplish this by sharing the file via a cloud service like Google Drive or by connecting your devices to a PC and copying the file to the new device.
- Once the VCF file has been saved to your newly acquired Android device, launch the Contacts application, press to reveal the menu, and select Import. To import your contacts into the Contact app, choose the VCF file!
Conclusion
The aforementioned methods represent the top strategies for Transfer Contacts from Android to Android. Choose an approach that is both simple to execute and reliable, then proceed to follow the provided instructions. Should you encounter any inquiries, feel free to reach out, and we’ll endeavor to assist you to the best of our ability.